Build a Compact Self-Watering Herb Tower for Your Windowsill
Small kitchens and narrow windowsills can still support a productive herb garden if you combine simple physics with tidy design. A compact self-watering herb tower uses a monitored reservoir and capillary action so herbs get steady moisture without daily watering. Below is a step-by-step method to build one, then a set of variations to suit different materials and plant choices, and finally troubleshooting guidance keyed to the most common issues.
Step-by-step method: build the tower
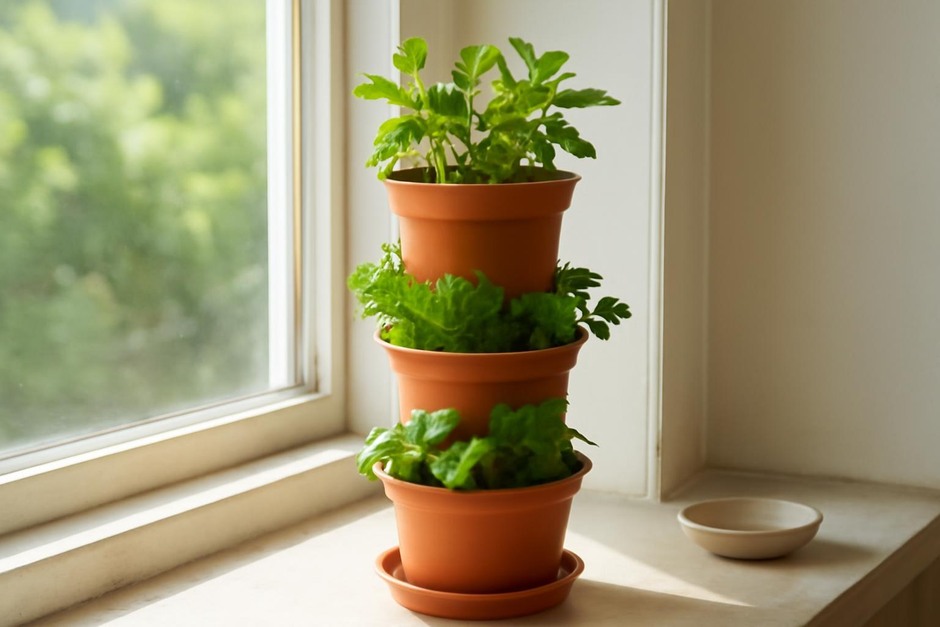
This build makes a three-level stackable tower from recycled containers. It fits a typical 30–50 cm (12–20 in) windowsill and supports small basil, chives, thyme or parsley plants.
- Gather materials
- Three identical plastic or ceramic pots with drainage holes (or cut plastic food tubs)
- A small shallow reservoir container to sit beneath the lowest pot (a recycled tray or wide jar)
- Capillary wicks: cotton rope, strips of old T-shirt, or cotton shoelace (one per pot)
- Potting mix (lightweight, well-draining)
- Small stones or coarse sand for a separation layer (optional)
- Scissors or a craft knife, and a drill if you need to punch holes
- Prepare the pots
- If pots lack drainage holes, create a 1–2 cm hole near the bottom side of each pot to allow the wick to pass through.
- Thread one end of a wick through each hole so about 5–8 cm hangs into the reservoir area when stacked; leave 10–15 cm inside the pot.
- Add separation and soil
- Place a 2–3 cm layer of small stones or coarse sand at the bottom of each pot to reduce the risk of waterlogging near roots.
- Fill with potting mix up to 2 cm from the top, keeping the wick embedded in the soil and slightly spread so it contacts the mix evenly.
- Stack and connect
- Set the reservoir container on the windowsill. It should sit beneath the lowest pot level and hold 250–800 ml depending on pot size.
- Arrange the lowest pot over the reservoir so each wick end reaches into the reservoir. Stack the second and third pots so their wick ends fall into the reservoir too or into a central channel that drains to the reservoir.
- Plant and prime
- Plant small herb seedlings or sow seeds according to packet depth. Water lightly from the top the first time until water flows down the wick into the reservoir — this primes the capillary action.
- Top up the reservoir to the recommended level; check the wicks remain moist.
- Place and monitor
- Move the tower to a sunny spot (most culinary herbs want 4–6 hours of light). Check reservoir weekly and top up when it drops by about a quarter.
Variations
Single-pot wick system
Use the same principle for just one pot sitting above a jar of water. This is the simplest form and ideal for a single basil plant or scallions.
Wickless sub-irrigation (SIP)
Instead of wicks, create a false bottom inside each pot and let the soil draw water upward through capillary soil pores. This works best with lightweight mixes and larger reservoirs to reduce topping frequency.
Hydroponic micro-tower
Replace soil with a inert medium (coco coir, perlite) and feed with a diluted liquid fertilizer in the reservoir. This increases growth rate but requires occasional nutrient monitoring.
Material swaps and scale
Use terracotta for more breathability (sip less likely to suffocate roots) or food-grade plastic for lightweight portability. Reduce heights for very narrow sill spaces or increase levels if depth allows.
Troubleshooting and fixes
- Wicks dry out
- Cause: wick material clogged, too thin, or reservoir empty. Solution: replace with thicker cotton, re-prime by soaking, or refill reservoir.
- Algae or bad smell in reservoir
- Cause: light reaching the water or stagnant reservoir. Solution: cover the reservoir to block light, rinse and refill weekly, and reduce top watering.
- Yellowing lower leaves; signs of overwatering
- Cause: poor drainage or reservoir level too high. Solution: raise the pot slightly to improve airflow, reduce reservoir level, and add more coarse separation layer.
- Leggy, weak growth
- Cause: insufficient light. Solution: move to a sunnier window or supplement with a small grow light for 4–6 hours daily.
- Pests (aphids, fungus gnats)
- Small infestations can be controlled by removing affected leaves, rinsing plants, and reducing overwatering. For fungus gnats, allow the top 1 cm of soil to dry between refills and consider a sticky trap.
With a little attention to the basic principle — a stable reservoir plus a reliable wick or capillary path — a compact herb tower keeps aromatic greens handy and low-maintenance. Start with one or two pots, observe how the system behaves for a week, then iterate: change wick thickness, reservoir size, or pot spacing to match your light and cooking needs.